

Overview
As part of Zendesk, Sunshine Conversations serves as a live chat solution. Integrating it with Chatbase gives your AI agent the ability to connect a customer to a live human agent for problems that need human interaction. This centralizes communication, so your support workspace can track and resolve inquiries efficiently.What you can do:
Let the AI handle routine questions, and hand the customer to a live Zendesk agent in real time when the issue needs a person.
Before you start
- A Chatbase account with an agent
- A Zendesk account on a Professional Suite plan or above
- Zendesk must already be connected in Chatbase before you connect Sunshine
How to connect Sunshine
1
Create an API key in Zendesk
- Sign in to your Zendesk account as an Admin and navigate to the Admin Center.
- Navigate to Apps and integrations > APIs > Conversations API.
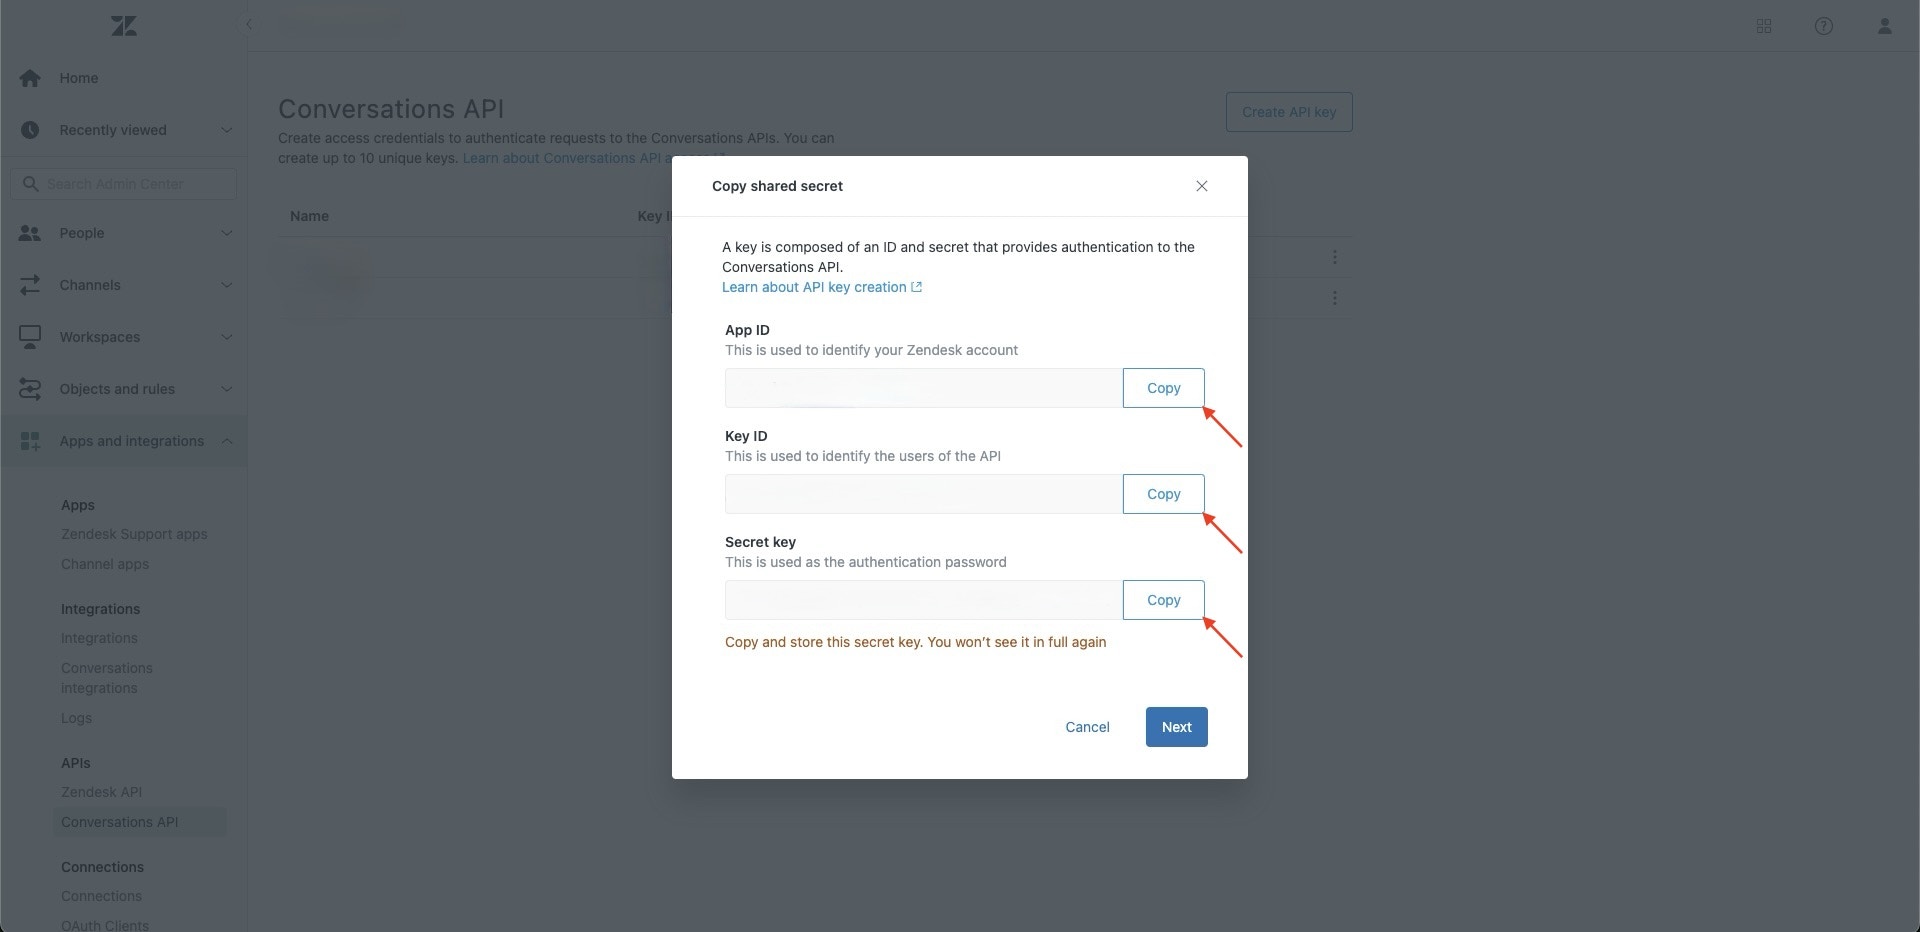
- Click Create API Key, enter Chatbase as the name, and press Next.
- Copy the App ID, Key ID, and Secret key displayed.
2
Set up the Sunshine integration in Chatbase
- Navigate to your Chatbase dashboard.
- Click the agent you wish to enable live chat for.
- Navigate to Integrations. Make sure Zendesk is connected before you attempt to connect Sunshine.
- Enter the copied App ID, Key ID, and Secret key, then press Submit.
3
Enable multi-conversations in Zendesk
Multi-conversations lets the same customer open multiple tickets, one per conversation, at the same time. Since a customer can have several conversations open at once, this must be enabled for a smooth experience.
- Sign in to your Zendesk account as an Admin and navigate to the Admin Center.
- Click Channels in the sidebar, then select Messaging and social > Messaging.
- At the top of the page, click Manage settings.
- Under Web Widget and Mobile SDKs, expand Multi-conversations.
- Click Set up multi-conversations.
- Click Turn on multi-conversations for your account, select the channels you want to offer multi-conversations on, then click Save.
4
Enable end messaging sessions in Zendesk
This lets agents end conversations when issues are resolved.
- Sign in to your Zendesk account as an Admin and navigate to the Admin Center.
- Click Channels in the sidebar, then select Messaging and social > Messaging.
- At the top of the page, click Manage settings.
- Under Advanced, expand Ending sessions.
- Select Agents can end messaging sessions at any time.
- Click Save settings.
5
Enable the Live Chat action
This action lets all customers, both identified and unidentified, start a live chat from the Chat Bubble, Help Page, or Center Stage.
- Navigate to your Chatbase dashboard.
- Choose the agent you integrated with Sunshine Conversations.
- Navigate to Build > Actions.
- Click Create Action, then select Sunshine live chat.
- Customize the When to use field, then save and enable the action.
Test the integration by asking your agent to speak to a human, and confirm the conversation reaches a live agent in Zendesk.
Limitations
- Sunshine requires Zendesk. The Zendesk integration must be connected in Chatbase first.
- A Professional Suite plan or above is required on your Zendesk account.
- Live chat needs an available agent. If nobody is present to take the conversation, the customer waits.
Next steps
Escalations action
Prefer an asynchronous handoff? Open a ticket instead of routing the customer to a live agent.